
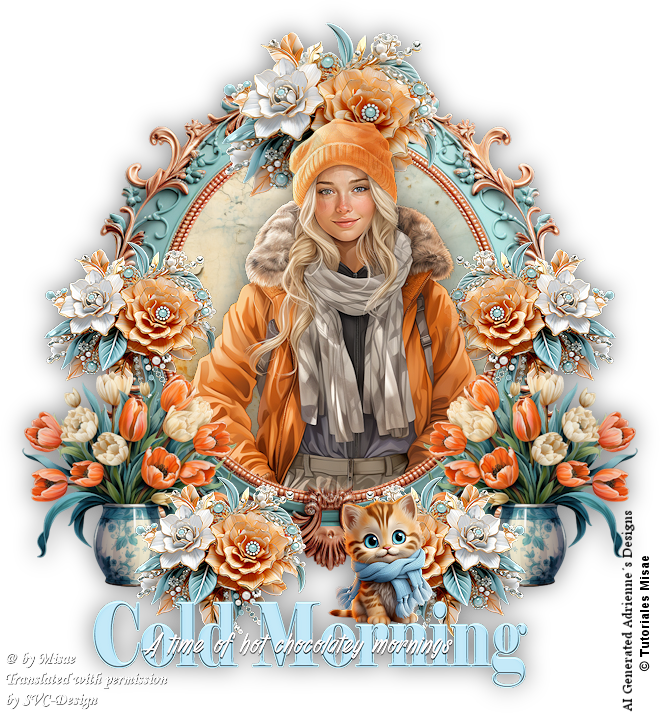
This lesson is made with PSPX9
But is good with other versions.
© by SvC-Design
Materialen Download :
Here
******************************************************************
Materials:
Cold Morning Element (10)
Cold Morning Element (37)
Cold Morning Element (108)
Cold Morning Frame (5)
Cold Morning Paper (16)
Cold Morning Tubes 2 (3)
Cold Morning Word Art (4)
Créditos Cold Morning
******************************************************************
Plugin:
no
******************************************************************
color palette
:
no
******************************************************************
methode
When using other tubes and colors, the mixing mode and / or layer coverage may differ
******************************************************************
General Preparations:
First install your filters for your PSP!
Masks: Save to your mask folder in PSP, unless noted otherwise
Texture & Pattern: Save to your Texture Folder in PSP
Selections: Save to your folder Selections in PSP
Open your tubes in PSP
******************************************************************
We will start - Have fun!
Remember to save your work on a regular basis
******************************************************************
1.
Open a new transparent image of 1000 X 750 px.
2.
Open Cold Morning Frame (5)
3.
Edit – Copy
Edit - Paste as new layer
4.
Image - Resize -70%
No check mark on resize all layers
5.
Adjust – scharpness – scharpen
6.
Layers - New Raster Layer
7 –
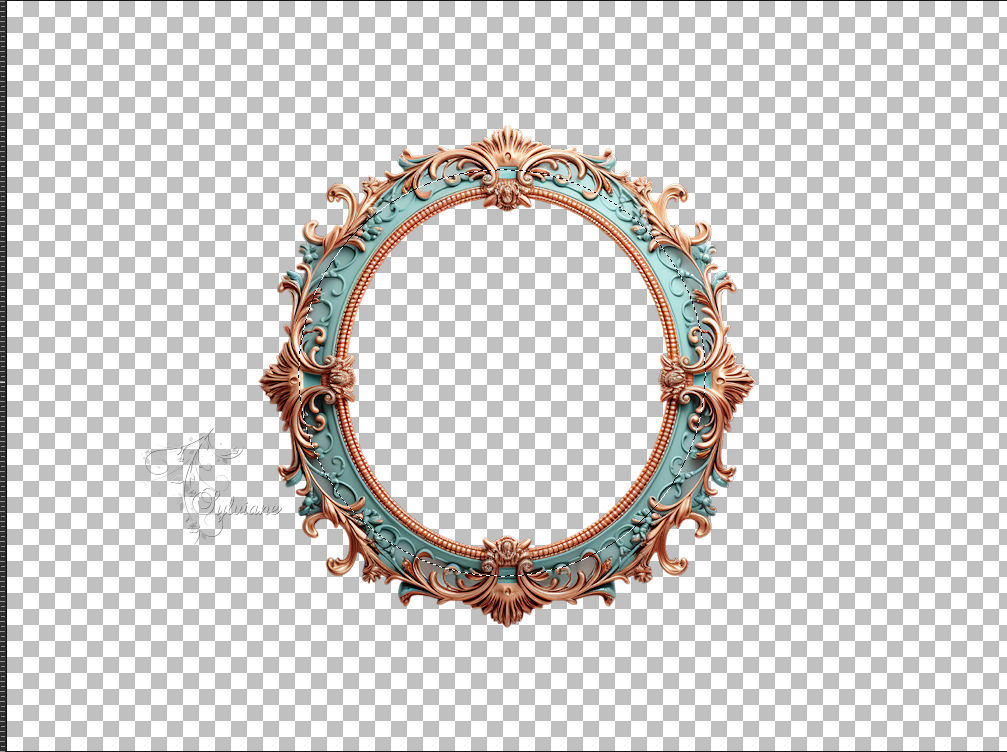
With the lasso tool draw a circle over the frame (it doesn't have to be perfect).
8.
Open Cold Morning Paper (16)
9.
Edit – Copy
Edit - Paste into selection
10.
Selection - Select None
11.
Layers – arrange – move down
12.
Open Cold Morning Element (10)
13.
Edit – Copy
Edit - Paste as new layer
14.
Layers – arrange – bring to top
15.
Image - Resize -40%
No check mark on resize all layers
16.
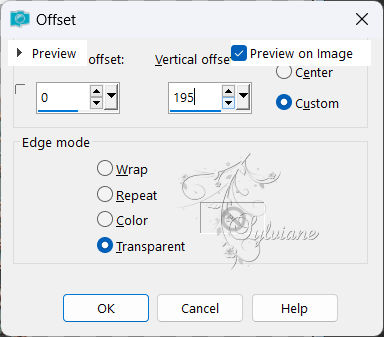
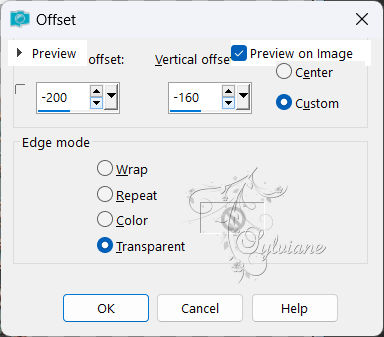
Effects - Image Effects - Offset
17.
Adjust – scharpness – scharpen
18.
Layers - Duplicate.
19.
Image - Resize -80%
No check mark on resize all layers
20.
Effects - Image Effects - Offset
21.
Layers - Duplicate
Image - Mirror – mirror Horizontal
22.
Layers – merge – merge down
23.
Adjust – scharpness – scharpen
24.
Open Cold Morning Tubes 2 (3)
25.
Edit – Copy
Edit - Paste as new layer
26.
Image - Resize -40%
No check mark on resize all layers
27.
Adjust – scharpness – scharpen
28.
Layers - Duplicate.
29.
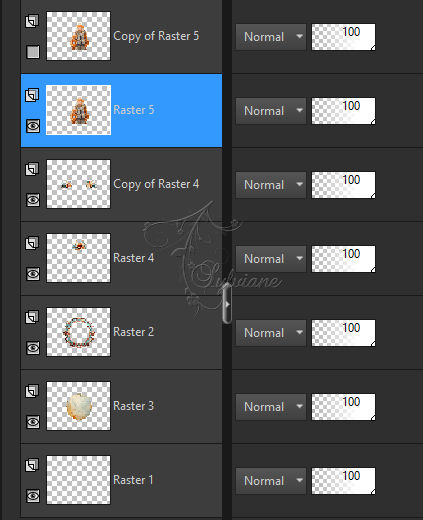
Close Copy of Raster 5
Activate Raster 5
30.
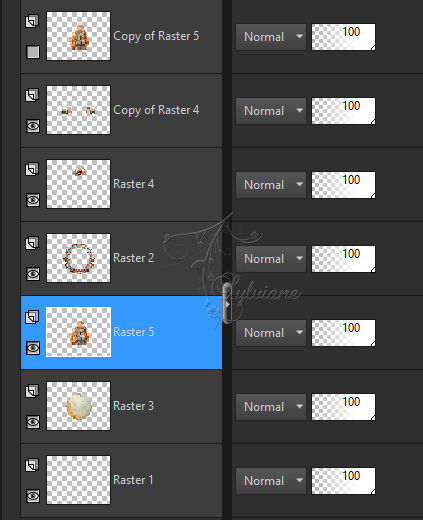
Layers – arrange – move down (3 x).
31.
activate and open Copy of Raster 5
32.
Effects - 3 D effects - Drop shadow
0/0/50/35 – color:#000000
33.
Open Cold Morning Element (37)
34.
Edit – Copy
Edit - Paste as new layer
35.
Image - Resize -40%
No check mark on resize all layers
36.
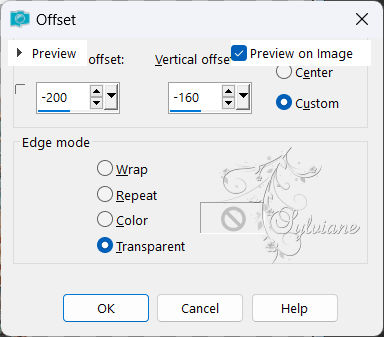
Effects - Image Effects - Offset
37.
Layers - Duplicate
Image - Mirror – mirror Horizontal
38.
Layers – merge – merge down
39.
Adjust – scharpness – scharpen
40.
Activate raster 4

41.
Layers - Duplicate
42.
Layers – arrange – bring to top
43.
Image - Resize -80%
No check mark on resize all layers
44.
Effects - Image Effects - Offset
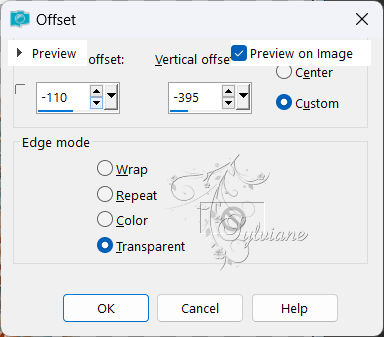
45.
Layers - Duplicate
Image - Mirror – mirror Horizontal
46.
Layers – merge – merge down
47.
Adjust – scharpness – scharpen
48.
Open Cold Morning Element (108)
49.
Edit – Copy
Edit - Paste as new layer
50.
Image - Resize -25%
No check mark on resize all layers
51.
Effects - Image Effects - Offset
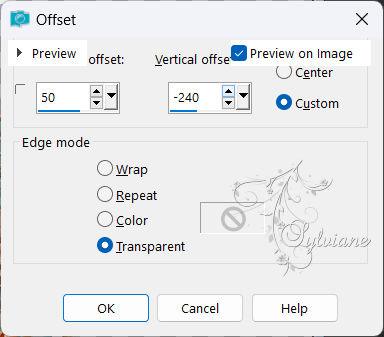
52.
Adjust – scharpness – scharpen
53.
Open Cold Morning Word Art (4)
54.
Edit – Copy
Edit - Paste as new layer
55.
Image - Resize -50%
No check mark on resize all layers
56.
Effects - Image Effects - Offset
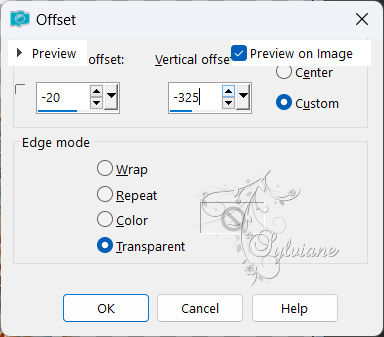
57.
Adjust – scharpness – schar
Activate Copy of Raster 5
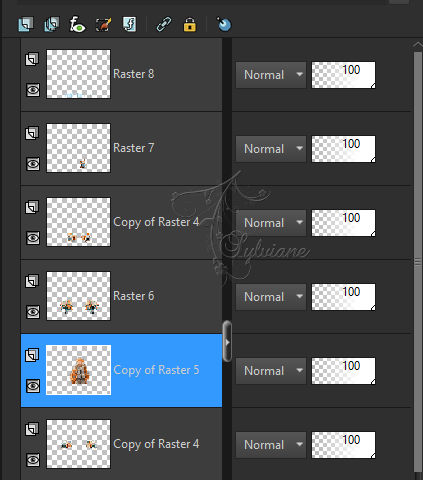
59.
Eraser with this settings.

60.
Erase this approximate piece of the girl with great care, if you go too far up or down nothing happens but be especially careful to the right and left.
before:

after:
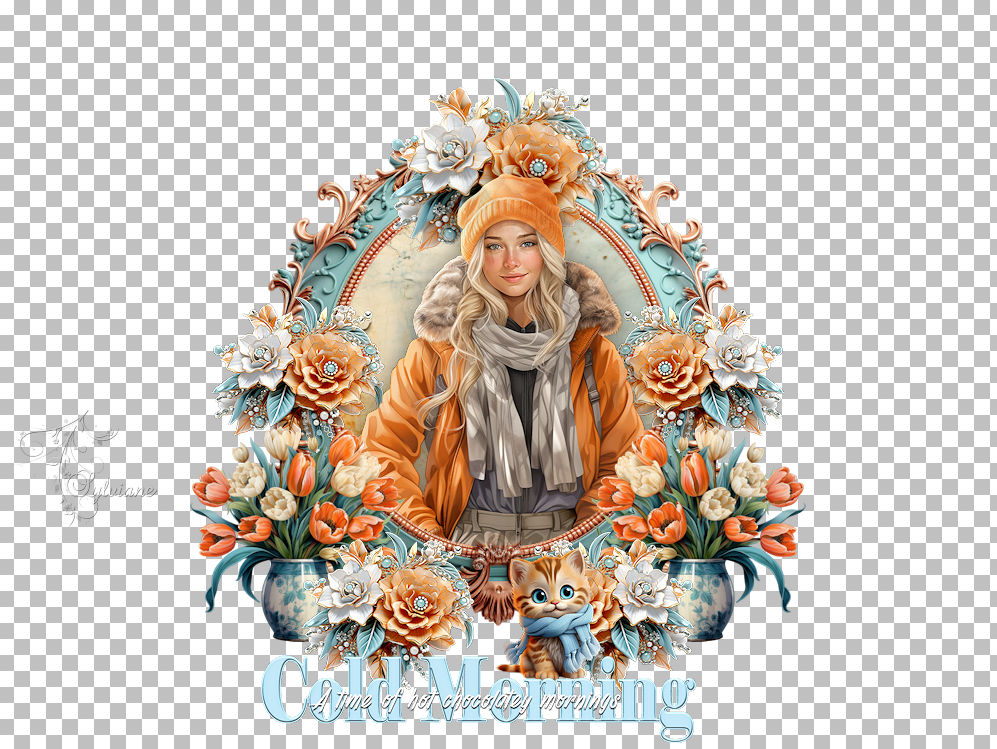
61.
Layers - Merge - Merge visible layers
62.
Image – canvas size
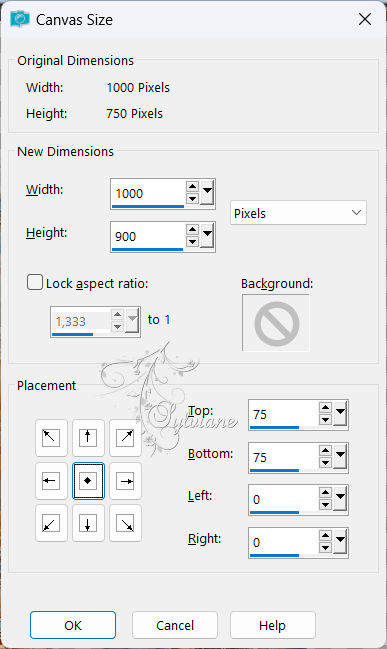
(With this tip you will not have problems with the shadows being cut, but remember always to enlarge the canvas size much more than the initial cloth, and then in Layout click in the middle, all this is done before applying the shadow...!)
63.
Effects - 3 D effects - Drop shadow
0/0/35/50 – color:#000000
64.
Edit/ Copy & Paste as a new image outside the work.
65.
New raster layer and we sign with our authorship and the authorship of the scrap.
66.
Layers - Merge - Merge visible layers
67.
Save as PNG
Back
Copyright Translation 2024 by SvC-Design
------------------------------------------------------------------------------
Thanks to all who created